Ugh, that moment when you’re all set for a ride, but your bike sputters and quits. It’s enough to ruin your day, right? Well, that pesky little problem might just be your motorcycle rectifier acting up.
Now, I know what you’re thinking, “Recti-what?” But stay with me. The rectifier, though small, is mighty important. Think of it like a conductor in an orchestra, subtly ensuring everything runs harmoniously. When it’s off, the whole performance, or in this case, your ride, can fall flat.
Okay, let’s not get too deep into tech-speak. We’re here to make things simple, not scare you off. So put on your thinking cap (or helmet), as we’re about to dive into this interesting world of rectifiers. No need for fancy terms or difficult instructions.
What’s coming next, you ask? Well, it’s going to be a no-nonsense, super simple guide. We’ll give you helpful tips and tricks to understand and test your bike’s rectifier. Ready? Let’s rev up and get started!
What is Rectifier And How Does It Work
A rectifier is an electrical device used in motorcycles (and other vehicles) to convert alternating current (AC) into direct current (DC). The primary function of a rectifier is to convert the alternating current generated by the motorcycle’s alternator or generator into a direct current required to power the motorcycle’s electrical systems and charge the battery.
Here’s How It Works:
- Alternating current (AC) is produced by the generator as the engine rotates.
- The AC current from the generator is connected to the input of the rectifier.
- The rectifier diodes allow current to flow in the positive half-cycle of the AC input while blocking the negative half-cycle.
- As a result, the AC waveform is converted into a pulsating DC waveform, where the negative portion is removed.
- The pulsating DC output is then smoothed using a capacitor or additional circuitry to reduce the ripple and provide a more stable DC voltage.
- The rectified and smoothed DC output is then used to charge the motorcycle’s battery and power the electrical system, including the lights, ignition system, and other accessories.
Different Methods to Test Motorcycle Rectifiers
Given below are some of the methods to test motorcycle rectifiers:
1. Multimeter Test:
Precautions:
- Ensure the motorcycle is turned off and the battery is disconnected before performing the test.
- Handle the multimeter with care to prevent damage to the device or injury to yourself.
Tools Required:
Multimeter (preferably digital) with voltage and resistance measurement capabilities.
Procedure:
- Set the multimeter to the resistance (ohms) mode.
- Disconnect the rectifier from the motorcycle’s electrical system.
- Identify the terminals of the rectifier: input terminals (AC) and output terminals (DC).
- Measure the resistance across the input terminals. It should show low resistance (close to zero ohms) in both directions.
- Measure the resistance across the output terminals. It should show high resistance (infinite or open circuit) in both directions.
- Reverse the multimeter leads and repeat the measurements to ensure consistency.
- If the resistance readings deviate significantly from the expected values, it may indicate a faulty rectifier.
- If the rectifier fails this test, further diagnosis or replacement may be necessary.
2. Battery Load Test:
Precautions:
- Ensure the motorcycle ignition is turned off.
- Disconnect any devices connected to the battery before conducting the test.
- Use caution when handling the battery and working with electrical connections.
Tools Required:
Battery load tester or a battery tester with load capabilities.
Procedure:
- Connect the battery load tester to the motorcycle battery terminals, following the manufacturer’s instructions.
- Turn on the load tester and apply a load equal to or slightly higher than the motorcycle’s electrical system.
- Observe the voltage displayed on the load tester while the load is applied.
- Compare the measured voltage with the specifications provided by the motorcycle manufacturer.
- If the voltage drops significantly or falls below the specified range, it indicates a potential issue with the rectifier or the battery.
3. Diode Test:
Precautions/Tools:
- Ensure the motorcycle battery is fully charged.
- Use a digital multimeter with a diode test function.
Explanation:
- Begin by disconnecting the rectifier from the motorcycle’s electrical system.
- Set the multimeter to the diode test mode and ensure the positive (red) probe is connected to the anode and the negative (black) probe to the cathode.
- Place the probes on the rectifier’s diode terminals.
- Observe the multimeter reading. A functioning rectifier should show a forward-biased voltage drop, typically around 0.5 to 0.7 volts. If the multimeter displays OL (open loop) or a reverse-biased voltage, it indicates a faulty rectifier.
4. AC Voltage Test:
Tools Required:
A multimeter or voltmeter is capable of measuring AC voltage and resistance.
Procedure:
- Set the multimeter to AC voltage mode.
- Connect the multimeter probes to the rectifier terminals, matching the polarity (positive to positive, negative to negative).
- Turn on the motorcycle’s engine or use an external power source to generate electricity.
- Read the voltage displayed on the multimeter.
- Compare the measured voltage to the manufacturer’s specifications for the rectifier.
- If the measured voltage is within the specified range, the rectifier is functioning properly. If not, it may be faulty.
5. Resistance Test:
Procedure:
- Set the multimeter to resistance mode.
- Connect the multimeter’s red lead to one terminal of the rectifier.
- Connect the multimeter’s black lead to the other terminal of the rectifier.
- Read the resistance value displayed on the multimeter.
- Compare the measured resistance with the specifications provided by the manufacturer.
- If the measured resistance is significantly different from the specifications or shows an open or short circuit, it indicates a faulty rectifier.
6. Heat/Temperature Test:
Precautions/Tools required:
- Temperature measurement tool (e.g., infrared thermometer)
- Heat-resistant gloves
- Avoid touching hot components to prevent burns.
- Multimeter
Procedure:
- Use an infrared thermometer to measure the temperature of the rectifier while the engine is running.
- Compare the measured temperature with that recommended by the brand.
- If the rectifier exceeds the recommended temperature range, it may indicate a malfunctioning rectifier.
7. Ripple Voltage Test:
Method:
- Disconnect the motorcycle’s battery to avoid electrical interference.
- Set the multimeter to the AC voltage setting.
- Connect the multimeter’s positive probe to the rectifier’s positive terminal and the negative probe to the negative terminal.
- Start the motorcycle and increase the RPM to a specified level.
- Observe and measure the AC voltage reading on the multimeter.
- Compare the measured value with the manufacturer’s specifications.
- If the ripple voltage exceeds the recommended limit, it indicates a faulty rectifier
8. Visual inspection
- Examine the rectifier for physical damage, such as cracks, burnt areas, or loose connections.
- Check for any signs of overheating, such as discoloration or melting of wires or components.
- Verify that all electrical connections are secure and free from corrosion.
- Inspect the rectifier’s mounting brackets or screws for tightness and proper alignment.
- Ensure that the rectifier is properly grounded to the motorcycle’s frame.
Signs of a Faulty Rectifier
A faulty rectifier in a motorcycle can manifest itself through various signs and symptoms. Below are several common indicators of a malfunctioning rectifier:
1. Battery issues:
One typical sign of a faulty rectifier is a drained or weak battery. While the engine is running, the rectifier is responsible for replenishing the motorcycle’s battery. If the rectifier fails to operate effectively, it may struggle to charge the battery adequately, resulting in a depleted battery or difficulties when starting the motorcycle.
2. Dim or flickering lights:
When a rectifier is faulty, the lights on the motorcycle, such as the headlights and indicators, may exhibit dimness or flickering while the engine is running. This occurrence stems from an irregular supply of voltage from the rectifier, disrupting the stability of the electrical system.
3. Overcharging battery:
Conversely, a malfunctioning rectifier can sometimes lead to battery overcharging. In such instances, the rectifier might generate an excessive amount of voltage, causing the battery to become overcharged. Overcharging gradually harms the battery and other electrical components.
4. Electrical system malfunctions:
A faulty rectifier can result in various electrical system malfunctions. For instance, you may experience issues with the ignition system, such as difficulty starting the motorcycle or sporadic engine performance. Additionally, other electrical components like the horn, indicators, or instrument cluster may exhibit erratic behavior or may not work at all.
5. Burning smell or melted wires:
In severe cases, a faulty rectifier can cause excessive heat buildup, leading to a burning smell or even melted wires. This can occur due to a short circuit or a malfunctioning rectifier component. If you notice a distinct burning odor or see melted or discolored wires near the rectifier, it’s crucial to address the issue promptly to avoid further damage or potential safety hazards.
6. Excessive heat:
While it is normal for the rectifier to generate some heat during operation, an unusually hot rectifier could indicate a problem. If you notice that the rectifier is excessively hot to the touch, it may be a sign of a faulty component or poor heat dissipation, requiring further inspection.
What are the causes why Rectifiers Goes Bad?
Motorcycle rectifiers can go bad due for various reasons. Here are some common causes:
1. Overheating: Rectifiers convert alternating current (AC) from the motorcycle’s stator into direct current (DC) to charge the battery. They generate heat during this process, and if the rectifier is not properly cooled or if the cooling system fails, it can overheat and eventually fail.
2. Voltage spikes: Voltage spikes or surges can occur in the electrical system of a motorcycle, which can put excessive stress on the rectifier. These spikes can be caused by faulty components, a defective regulator, or issues with the charging system. The rectifier may fail if it is unable to handle the sudden increase in voltage.
3. Voltage regulator failure: The voltage regulator regulates the amount of voltage supplied to the bike’s electrical system. If the voltage regulator malfunctions, it can send an excessive amount of voltage to the rectifier, causing it to fail.
4. Wiring issues: Faulty or damaged wiring, for instance, has the potential to disrupt the current flow, resulting in irregular patterns or even short circuits. Such unfavorable conditions can spell trouble for the rectifier, subjecting it to potential damage.
Moreover, loose connections, frayed wires, or terminals corroded by the passage of time can further exacerbate the situation by interfering with the smooth electrical flow and placing undue strain on the rectifier.
5. Excessive load: In the event that the vehicle’s electrical system is burdened with an excessive load, which may include a wide array of power-hungry accessories such as high-power lights, heated grips, or additional electronic devices, the rectifier may face an arduous task.
This is primarily due to the increased demand placed on the rectifier, as it may struggle to cope with the intensified load. Consequently, the rectifier may find itself overwhelmed, ultimately succumbing to the pressure and failing as a consequence.
6. Moisture and corrosion: The rectifier’s arch-nemeses come in the form of moisture, water, and corrosive elements. Exposure to these environmental factors can prove detrimental to the rectifier’s well-being. Moisture, for instance, possesses the uncanny ability to instigate electrical shorts or initiate a corrosive process that eats away at the rectifier’s internal components.
This, in turn, renders the rectifier vulnerable to failure, as the damage inflicted gradually takes its toll on the rectifier’s functionality.
7. Age and wear: Just like any other electrical component, rectifiers are not impervious to the passage of time. Over the years, the internal components of rectifiers may undergo a process of natural deterioration.
This wear and tear gradually diminishes the rectifier’s efficiency, as the internal workings of the component may begin to wear out or degrade. As a result, the rectifier’s ability to function optimally becomes compromised, ultimately leading to its eventual failure.
Can you repair a Rectifier?
Yes, it is absolutely feasible to restore a motorcycle’s rectifier. When the rectifier fails to perform its function adequately, it can give rise to an array of complications, ranging from a lifeless battery and headlights losing their brilliance to various other electrical malfunctions.
Nonetheless, in numerous instances, instead of opting for a replacement, a defective rectifier can be mended, which not only saves valuable time but also proves to be a cost-effective solution.
To initiate the repair process for a motorcycle’s rectifier, the primary course of action involves identifying the issue at hand. This may entail employing a multimeter or any other diagnostic tool to meticulously evaluate the rectifier’s operational status. Once it is determined that the rectifier is indeed defective, the subsequent step entails pinpointing the specific element or elements that are contributing to the problem.
In certain scenarios, a straightforward repair suffices, such as the replacement of a blown fuse or the restoration of a damaged wire. On the other hand, more intricate repairs might be required in other cases, such as the substitution of a faulty diode or even the complete replacement of the rectifier assembly.
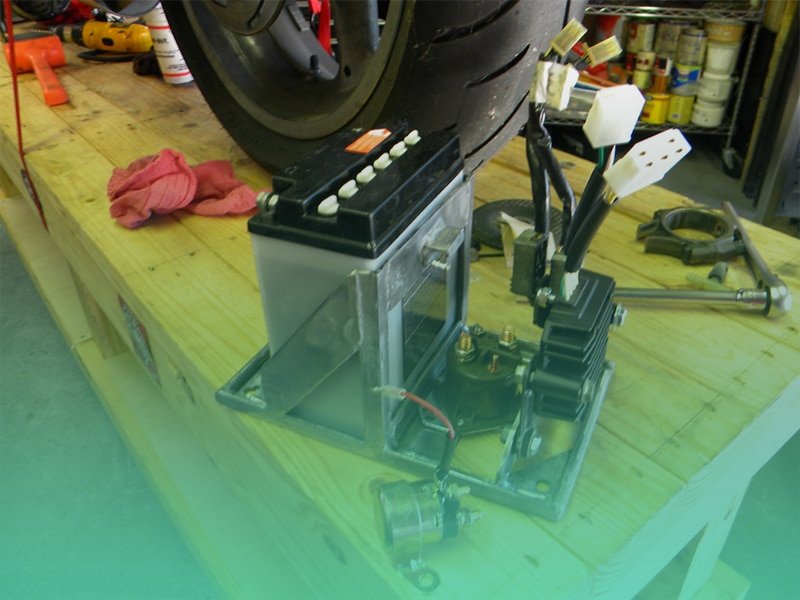
How to replace a Rectifier on a motorcycle
Replacing a rectifier on a motorcycle requires basic mechanical knowledge and tools. Here’s a step-by-step guide to help you through the process:
Step 1: Gather the necessary tools and materials
- Service manual for your motorcycle (specific to your model)
- Replacement rectifier (ensure it’s compatible with your motorcycle)
- Basic hand tools (socket set, wrenches, screwdrivers)
- Electrical tape or heat shrink tubing
- Wire cutters/strippers
- Multimeter (for testing electrical connections)
Step 2: Prepare the motorcycle
- Park the motorcycle on a flat surface and turn off the engine.
- Disconnect the negative terminal of the battery to prevent electrical shocks or short circuits.
Step 3: Locate the old rectifier
- Consult your motorcycle’s service manual to find the location of the rectifier. It’s typically mounted near the battery or the electrical system.
- Inspect the old rectifier and take note of its connections.
Step 4: Remove the old rectifier
- Disconnect the wiring harness or electrical connectors from the rectifier.
- Remove any mounting screws or bolts that secure the rectifier to the motorcycle’s frame or bracket.
- Carefully detach the old rectifier from its mounting position.
Step 5: Install the new rectifier
- Position the new rectifier in the same location where the old one was removed.
- Secure the rectifier to the frame or bracket using the appropriate screws or bolts.
- Connect the wiring harness or electrical connectors to the corresponding terminals on the rectifier. Ensure the connections are tight and secure.
- If the new rectifier has different terminal configurations, refer to your motorcycle’s service manual for proper wiring instructions.
Step 6: Test the installation
- Reconnect the negative terminal of the battery.
- Turn on the motorcycle’s ignition and check if the new rectifier is functioning correctly.
- Use a multimeter to test the electrical connections and ensure the proper voltage is being delivered.
Step 7: Finalize the installation
- Once you’ve confirmed the new rectifier is working correctly, tidy up the wiring by securing any loose wires and using electrical tape or heat shrink tubing to protect exposed connections.
- Double-check all connections and ensure they are secure.
FAQs
Final Thoughts
All in all, testing your motorcycle rectifier is a critical step in ensuring the optimal functioning of your motorcycle’s electrical system. By adhering to the steps elucidated in this article, you can readily diagnose any rectifier issues and take appropriate measures to repair or replace it.
Always bear in mind that a faulty rectifier can inflict damage upon other electrical components in your motorcycle, so it is prudent to prioritize safety. By conducting regular tests and upkeeping your motorcycle’s electrical system, you can relish a ride that is both safer and more dependable.